Compensating for Something?
This is another long one, but if you’ve ever struggled to understand Exposure Value Compensation (or never used it), this might help. Put the coffee on and settle in for a bit.
Skipping past the inevitable moment when I’m walking around with my 600mm lens and someone asks if I’m compensating for something, the answer is generally yes. I am. But it’s not what you think.
After my last article about digital noise and high ISOs, I received a good question about the use of Exposure Value Compensation (or “EV compensation”), and this felt like as good a moment as any to try to clarify it for those who struggle to understand the concept. You can go back later to giggling about what the size of my very long lenses implies about me.
There are many ways to get to an exposure that does what you want it to do. You can always shoot on Manual the way God intended when He invented the camera (I’m kidding!), or you can use one of several different program or automatic modes. Of these, most serious photographers will use either Aperture priority (usually A or AV) or Shutter priority (usually TV for Time Value or S for Shutter) because of the control these modes offer.
Aperture priority allows you to choose the aperture, letting the camera work out the shutter speed. Shutter priority lets you choose the shutter speed, and the camera will choose the aperture. But there’s another way to let the camera make some of your choices: by remaining in Manual mode and selecting both your desired aperture and shutter speed but letting the camera choose your ISO.
All of these ways of shooting have their benefits. In the course of a year, I use them all depending on the circumstances, what I want my photograph to look like, and how quickly the light might be changing. Most of the time, however, I shoot in Manual mode, controlling my shutter speed and aperture but using Auto ISO to let the camera pick the ISO for me. For the sake of this conversation, it really doesn’t matter; what matters is that if you allow the camera to make even one of those choices for you, you must have a way to tell the camera to either make the image a little darker or a little lighter according to your needs, or the camera will give you average all the time. And average is often boring and not what I want.
But can’t you just close the aperture a little? Maybe go from f/2.8 to /5.6 and darken things up? Or maybe slow the shutter from 1/500 to 1/250 to lighten the picture? No. You can’t. I mean, yes, you can, but those changes (in any automatic mode, including Auto ISO) won’t do what you hoped. The exposure value—the total amount of light that hits the sensor or film—will remain the same. The camera thinks you need X amount of light. Opening or closing the aperture (using Aperture priority) will only change the shutter speed to give you the same exposure value. If you’re in Manual mode using Auto ISO, the camera will keep changing the ISO no matter what you do with the aperture or shutter speed because it’s trying to give you the same exposure value.
If you only want the camera to make the picture lighter or darker and you’re in an automatic mode, you need a different tool.
Enter “EV compensation”. Using EV compensation means you’re telling the camera, “Hey, you’re close with that exposure, but for this picture, I really wanted things to be 3 stops darker.” Or 2 stops lighter. Whatever. EV compensation gives you a way to change the target exposure for the camera. Instead of giving you an average exposure, you can tell the camera to go darker or lighter.
An example. I’m shooting into the sun and there’s a lion silhouetted on the horizon. I’ve chosen a tight aperture of f/16 so both the lion and the setting sun are in focus. I’m in Aperture priority mode, and the camera decides a shutter speed of 1/500 is perfect. But when I look at the resulting image, it’s way too bright. Close the aperture down to f/22, right? Well no, because the camera will shift the shutter speed down to 1/250: different settings, same exposure value. The resulting overall exposure won’t change because I haven’t told the camera that I want things darker, so it thinks I just want more depth of field without changing the total exposure value. This is when you use EV compensation. Set EV comp to -3 stops (or whatever), and now the image is darker. The reverse is true: set the EV compensation to +3 (or whatever), and you’re telling the camera to make it brighter.
When shooting in automatic modes without EV compensation, we would have no way to tell the camera to give us a different result—either lighter or darker.
Why do I shoot the way I do? Why not just go full Manual or Aperture priority mode? I could. We all have our preferences. But for me, most of the time, I want to choose both my aperture and my shutter speed; they have a more direct effect on what the photograph looks like. ISO? Much less so. So I shoot in so-called Manual mode, but use Auto ISO, which has a lesser effect on the look of the image. Changing my shutter speed from 1/1000 to 1/100 could make the image unusable if I have a moving subject or use a longer lens. Changing my aperture from f/1.8 to f/22 can dramatically change my depth of field and diminish the mood of that soft background. But changing my ISO? For the work I do it usually doesn’t matter as much the effects of specific shutter speeds and apertures.
I care much more about my shutter speed and aperture than about ISO. Those are the two settings I want to know aren’t changing all over the place. But let my ISO float and be the setting that takes up the slack, and I know what my photographs will look like in terms of motion and depth of focus. And because I’ve got the thumb wheel on the back of my cameras set to control my EV compensation, it’s very simple to nudge things lighter or darker with just my thumb.
I like to stay as much in the moment as possible, which means fiddling with the fewest buttons and dials. Over time, I’ve settled on this approach as the strongest and most intuitive for me—a way to let the camera get me into the ballpark with my exposure without me handing over the reins to the important stuff—and by using EV compensation to more tightly control my exposures with one spin of the thumb. A little lighter, a little darker. This is especially helpful when the light keeps changing and I’m trying not to overexpose my highlights. Keep the blinkies on, watch the histogram at all times, and it’s mostly one change I need to make (assuming I don’t suddenly want to shift my shutter speed or aperture for creative or aesthetic reasons).
Try it. That’s the best way to see what I’m going on about. Set the camera to Aperture mode (and for now, not on Auto ISO) and put it smack in the middle at f/8. Take a shot. Nice. Now open the aperture to f/2.8 and the camera will shift your shutter speed. Yet the exposure will look the same in terms of how light or dark it is (as long as you metered from the same spot and the light doesn’t change). Now figure out where your EV compensation is. By default, it’s usually a combination of spinning a dial and pressing a button with this symbol: +/-
When in doubt, Google your camera model and EV compensation. Now leave the aperture where it was (or shutter speed in Shutter priority) and move the EV compensation up and down. The camera makes the image brighter or darker. Now you know. It’s a simple but powerful tool if you want stronger control over your exposure. Coupled with Auto ISO, it gives you that control without also changing what shutter speed does to motion and what aperture does to depth of focus.
I’m not advocating one way of shooting or another, but I’m hoping this will give you a sense of how to shift that overall exposure when using automatic modes. A few final notes. Remember that if you’re in Manual mode and you do not use Auto ISO, EV compensation will do nothing. You don’t need it because the camera thinks you’re doing it all yourself with shutter, aperture, and ISO. It’s also probably helpful to know that Auto ISO will allow you to set parameters (like a maximum ISO), which you’ll want to do if there are ISOs beyond which you’d rather not shoot.
I’m happy to help clarify. This is one of those subjects where there are a lot of “what ifs” and “yeah buts.” Drop a comment below and I’ll do what I can to simplify this. Lastly, I’ve had some questions lately about how my recovery is going since the amputation. I’ve included an update below, so keep reading!
For the Love of the Photograph,
David
Footnotes: An Update
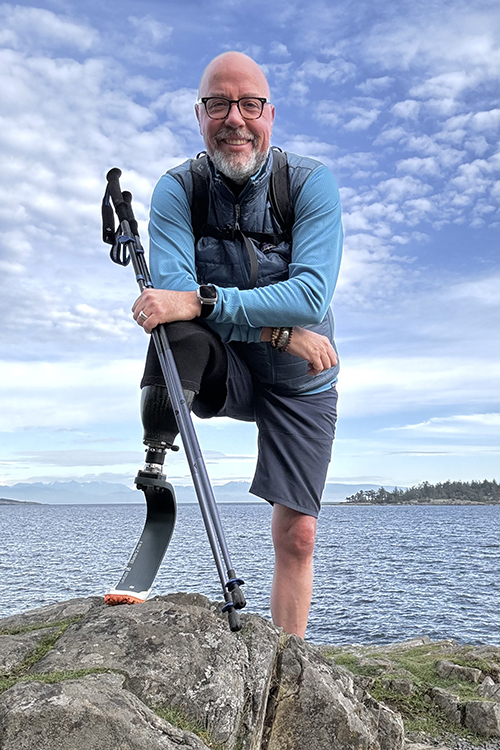
I’ve just passed my 6-month ampuversary and couldn’t be happier with my progress. A month ago, I got a new running blade and while I wouldn’t say I’m tearing up the trails, I have been running, as far as 3km, for the first time in 12 years. I’m hiking as far as 4km at least once a week, and slowly things feel more and more normal. I’ve got my work cut out for me; my weeks are filled with chiropractic, massage, physio, and training at the gym. But I’ve also got trips to Kenya and Zimbabwe planned, a couple of expeditions to photograph wolves, three bear trips, and a drive to the Arctic Ocean all planned for the coming year. It feels so good to dream again! Thank you all for such enthusiastic support. Your cheer-leading has brightened the darker days and I am so grateful.

